Deploying the Kubernetes Dashboard with Helm: A Complete Information
Associated Articles: Deploying the Kubernetes Dashboard with Helm: A Complete Information
Introduction
On this auspicious event, we’re delighted to delve into the intriguing subject associated to Deploying the Kubernetes Dashboard with Helm: A Complete Information. Let’s weave attention-grabbing data and supply recent views to the readers.
Desk of Content material
Deploying the Kubernetes Dashboard with Helm: A Complete Information

The Kubernetes Dashboard supplies a user-friendly internet UI for interacting together with your Kubernetes cluster. Whilst you can manually deploy the Dashboard, utilizing a Helm chart considerably simplifies the method, providing model management, simple upgrades, and repeatable deployments. This text delves deep into deploying and managing the Kubernetes Dashboard utilizing a Helm chart, protecting finest practices, troubleshooting widespread points, and superior configuration choices.
Understanding Helm and its Benefits
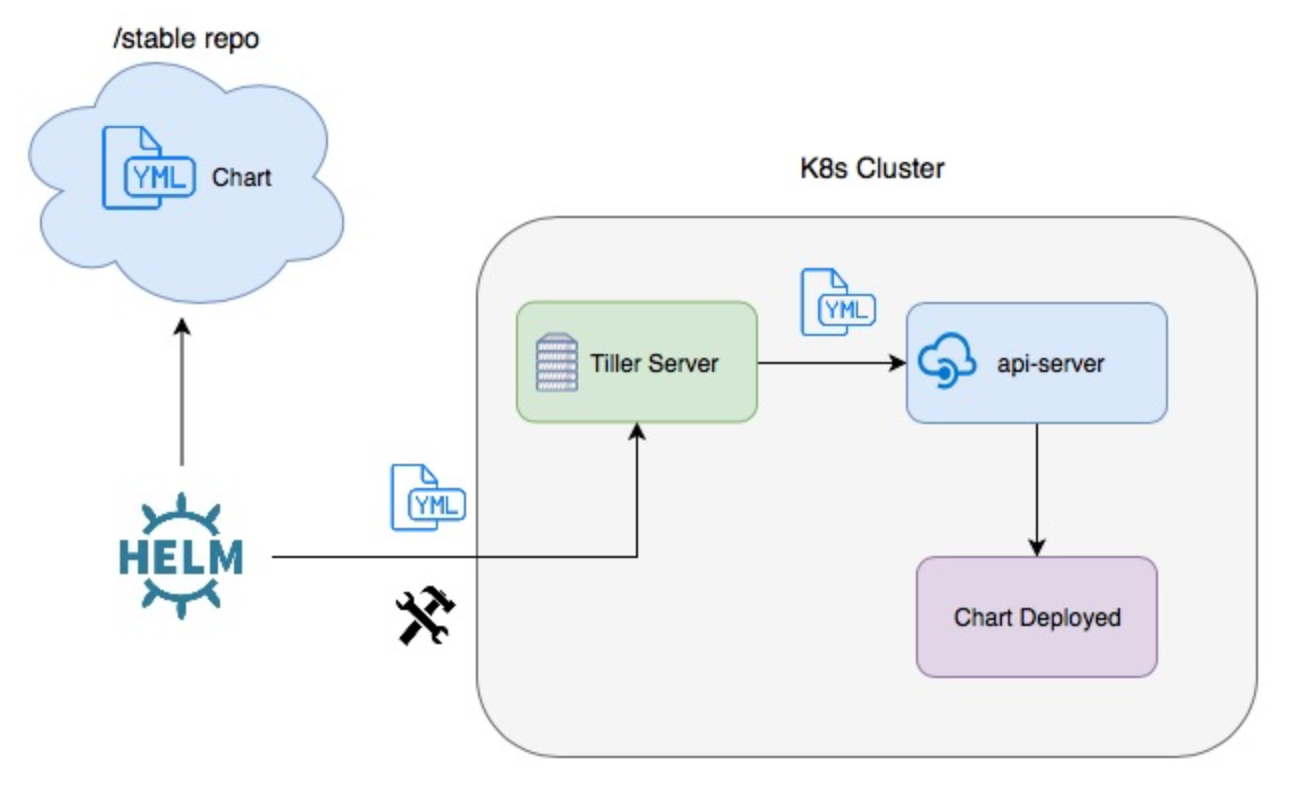
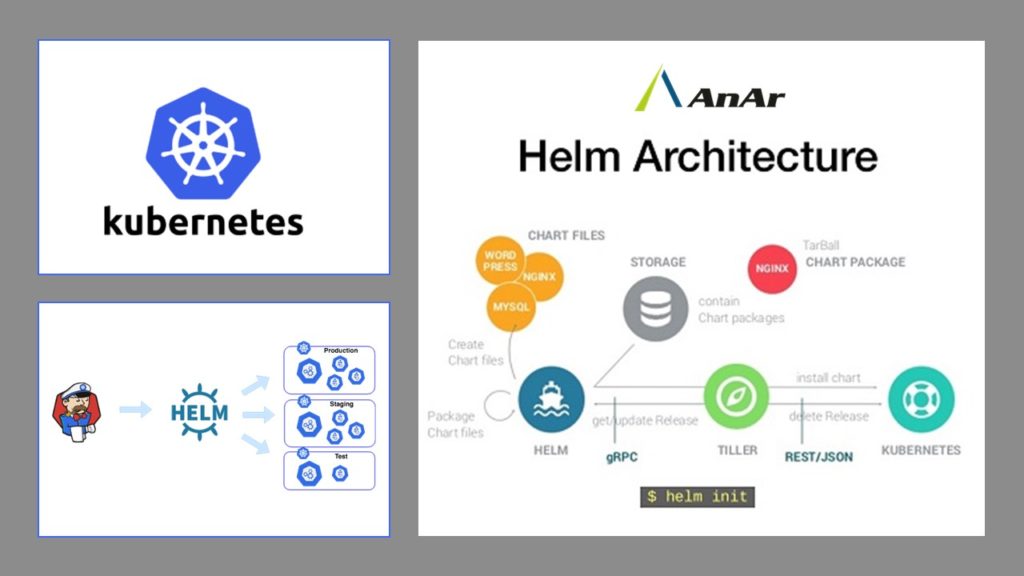
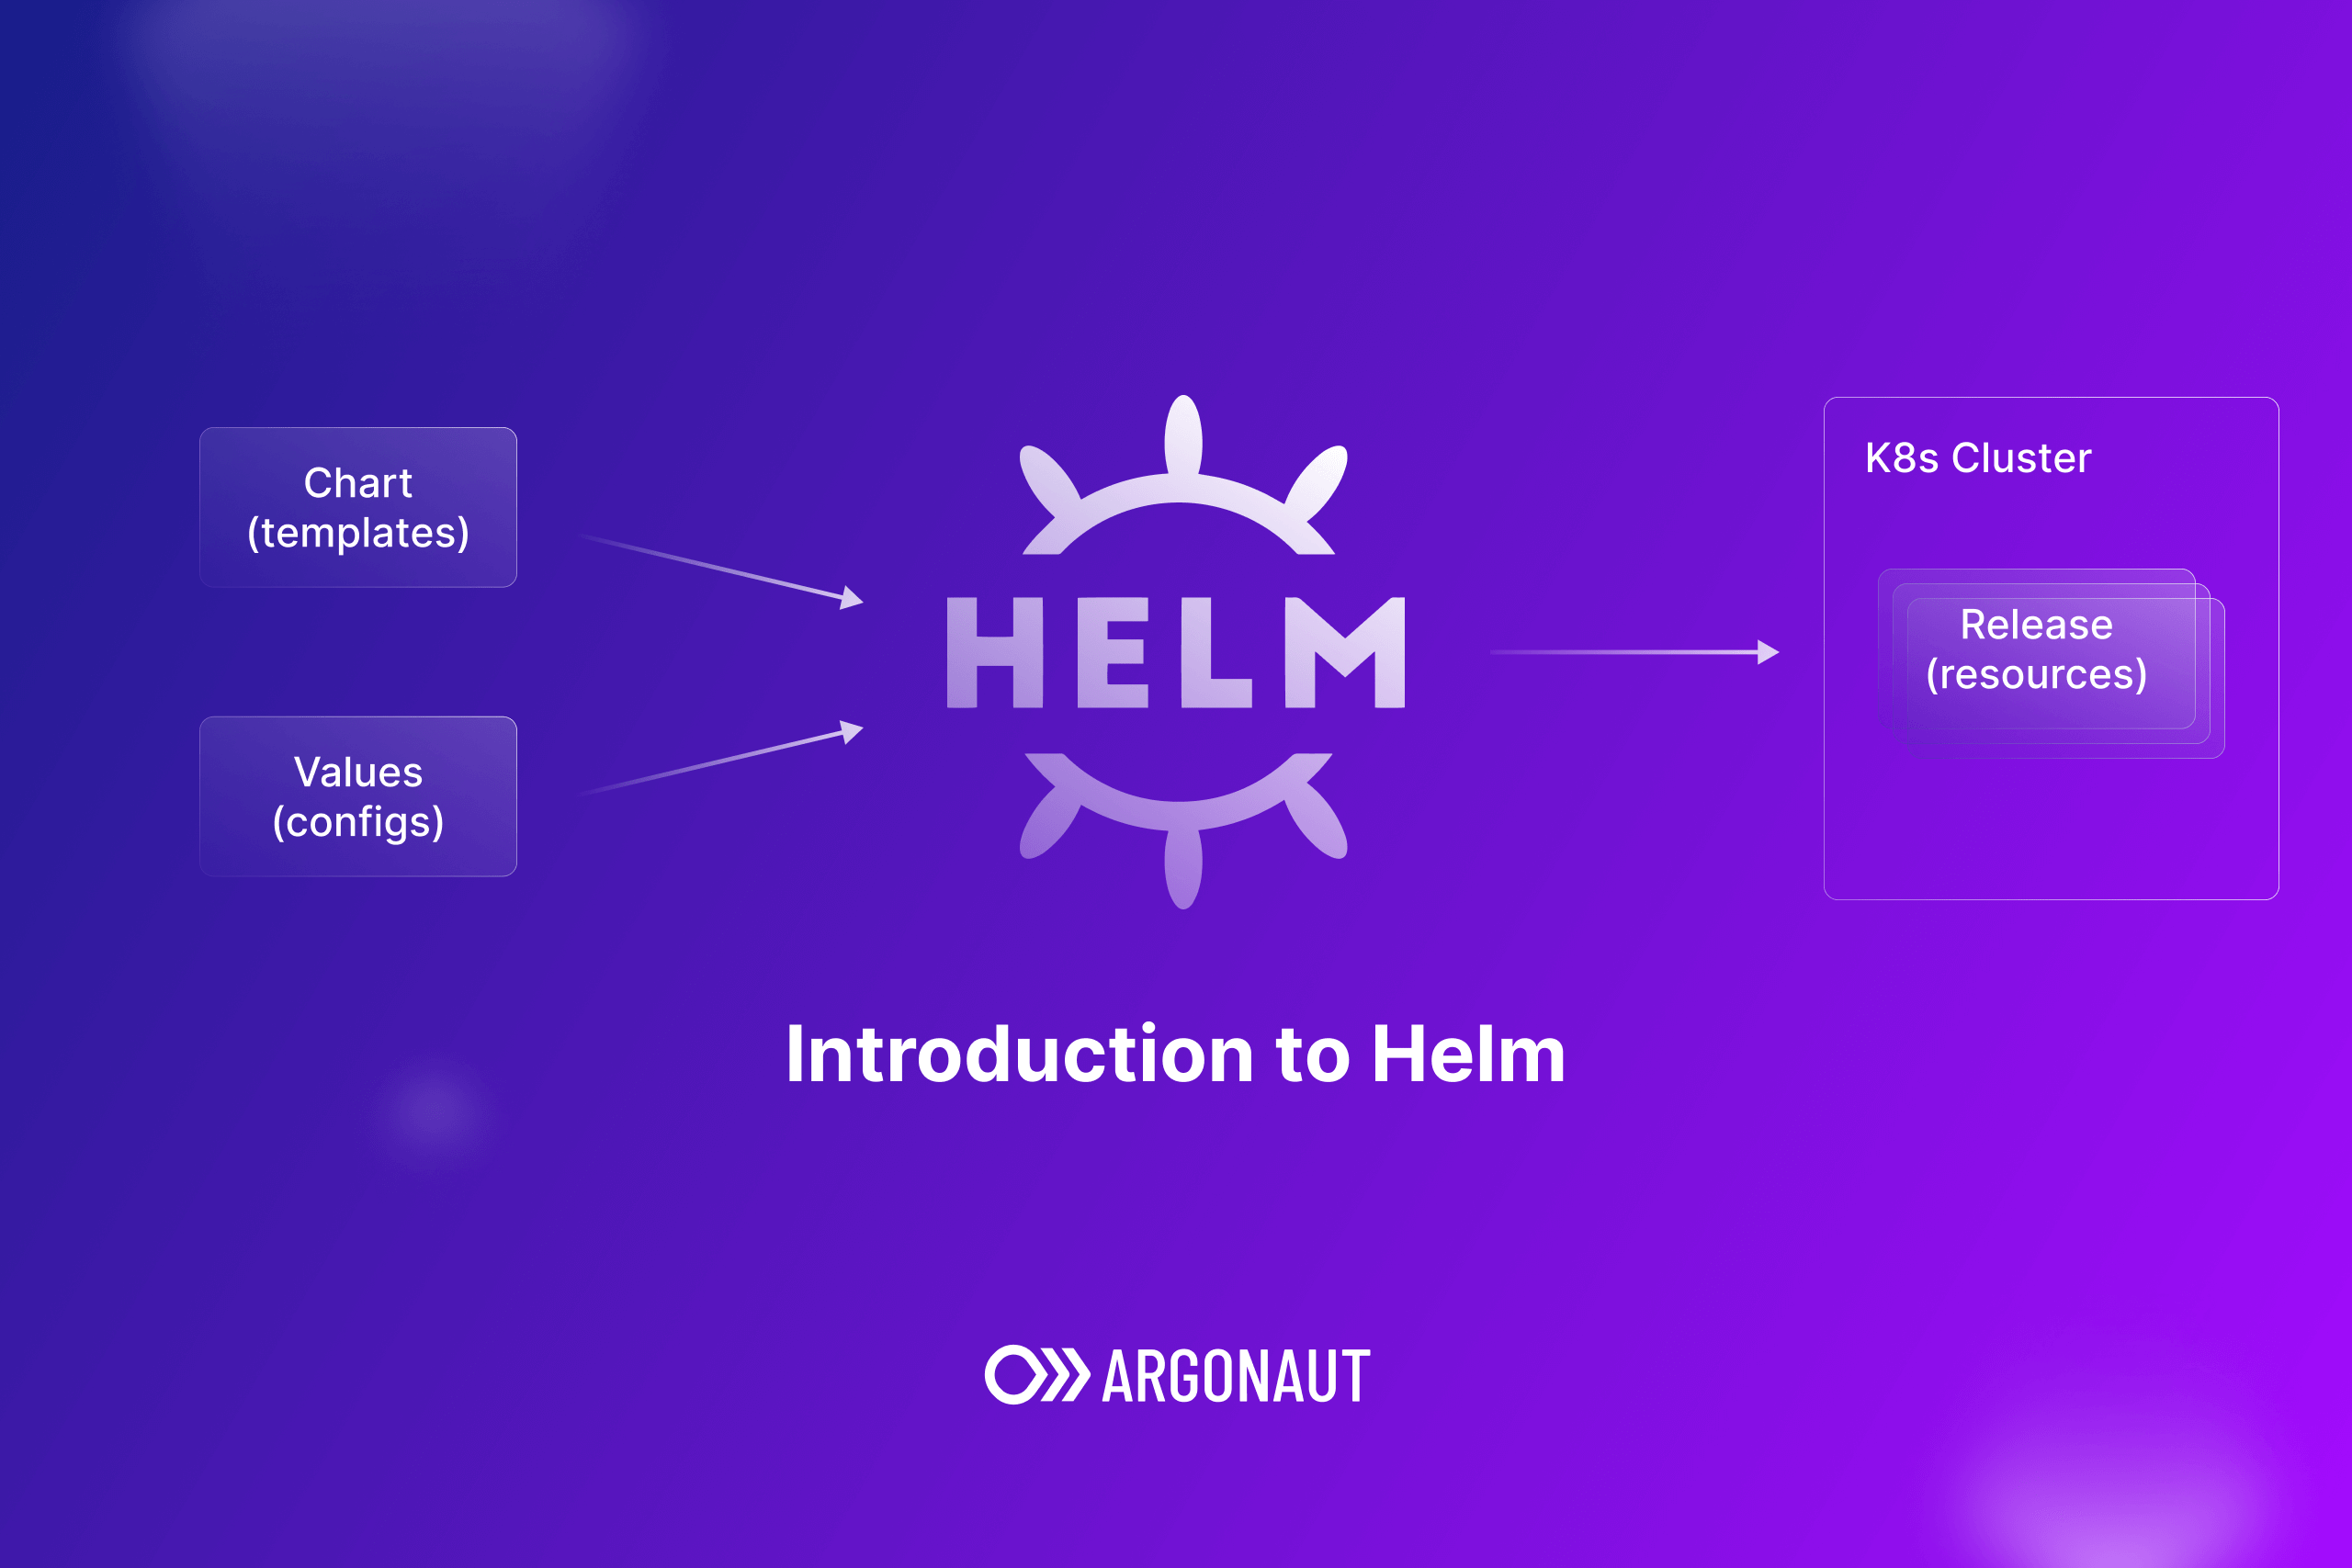
Helm is a bundle supervisor for Kubernetes, permitting you to outline, set up, and handle Kubernetes purposes by pre-packaged charts. A Helm chart is a set of YAML recordsdata that describe the sources wanted to deploy an utility, together with deployments, companies, and configurations. Utilizing Helm for the Kubernetes Dashboard presents a number of benefits:
- Simplified Deployment: As an alternative of manually creating and making use of YAML manifests, you merely run a single Helm command.
- Model Management: Helm charts are versioned, permitting you to trace modifications and simply rollback to earlier variations.
- Reproducibility: You may simply recreate the identical deployment throughout totally different clusters.
- Configuration Administration: Helm charts help customizable values, permitting you to tailor the deployment to your particular wants.
- Straightforward Upgrades: Updating the Dashboard is so simple as working a Helm improve command.
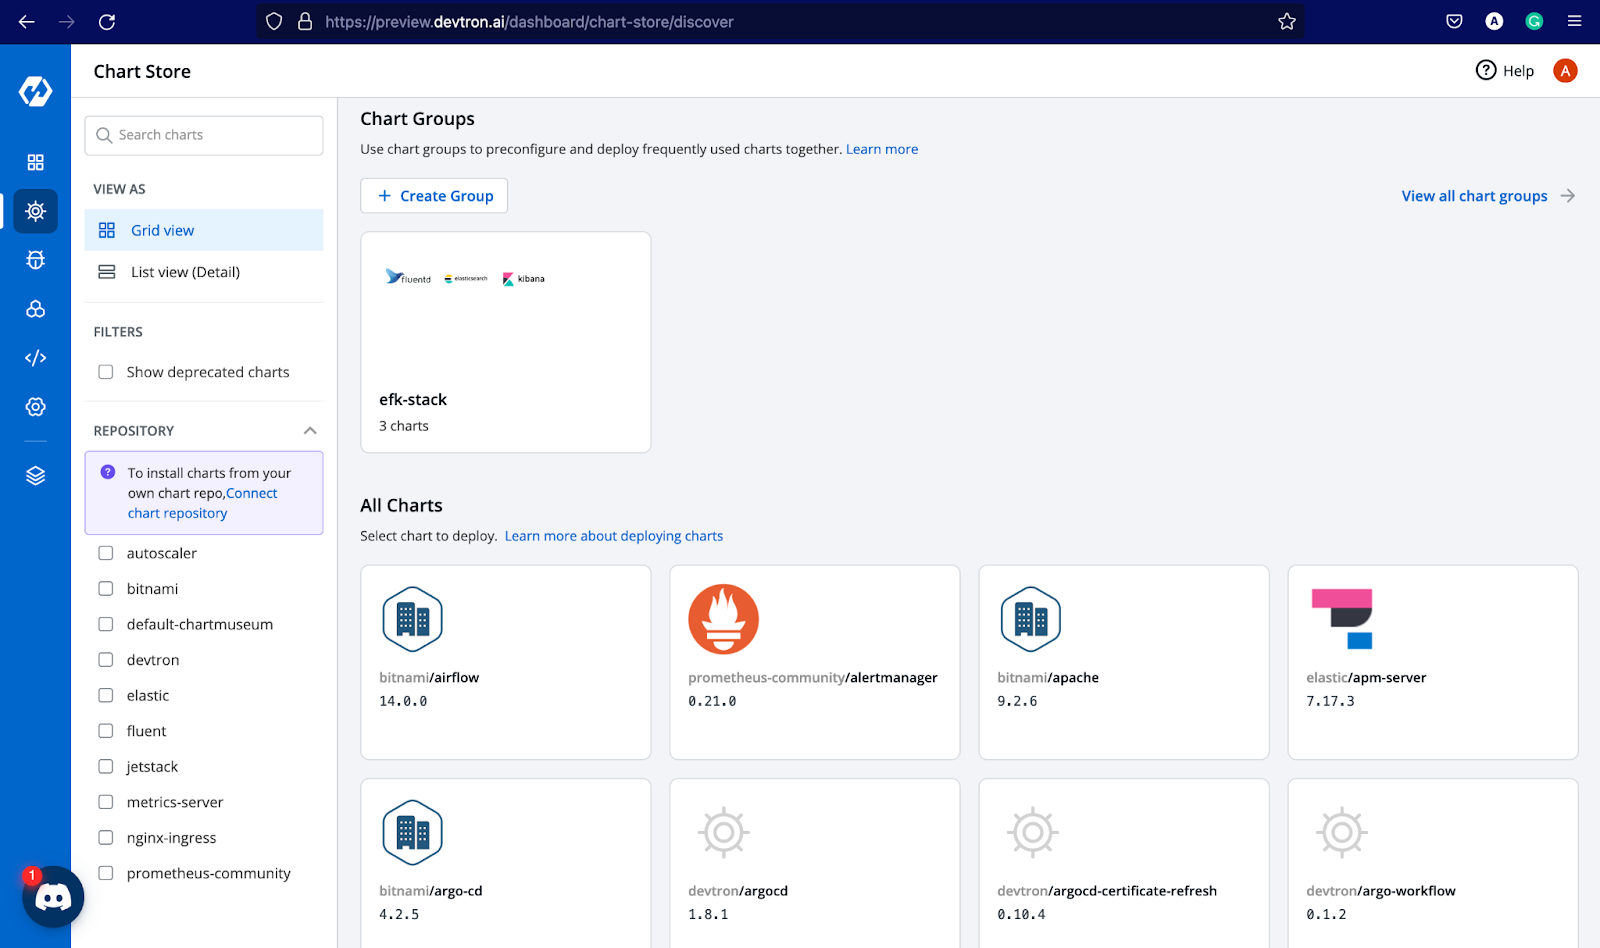
Selecting a Helm Chart Repository
A number of community-maintained and official Helm charts exist for the Kubernetes Dashboard. The official Kubernetes chart repository is a dependable supply, however others would possibly supply extra options or customizations. It is essential to pick out a good supply to make sure the chart’s safety and stability. When selecting, think about:
- Upkeep: Test the chart’s replace frequency and the responsiveness of the maintainers.
- Neighborhood Help: A chart with lively group help is useful for troubleshooting.
- Options: Consider whether or not the chart presents the options you want, resembling RBAC integration or customized useful resource configurations.
Putting in the Kubernetes Dashboard with Helm
The next steps define the method of deploying the Kubernetes Dashboard utilizing a Helm chart, assuming you have got Helm and kubectl put in and configured. We’ll use the official Kubernetes chart for instance. Substitute <chart_repository> with the precise repository URL in case you are not utilizing the official repository.
-
Add the Chart Repository: If you have not already, add the Kubernetes chart repository:
helm repo add kubernetes https://kubernetes.github.io/ingress-nginx helm repo replace -
Set up the Chart: Use the
helm set upcommand to deploy the Dashboard. This instance makes use of a launch identify "kubernetes-dashboard":helm set up kubernetes-dashboard kubernetes/dashboard -
Entry the Dashboard: As soon as the set up is full, discover the service URL. You need to use
kubectlto get the exterior IP and port:kubectl get service kubernetes-dashboard -n kube-systemThe output will present the exterior IP and port. Entry the Dashboard by your browser utilizing this URL. Be aware that you just would possibly must configure port forwarding if the service is not uncovered externally.
Configuring the Dashboard with Helm Values
The Helm chart permits you to customise the Dashboard deployment by a values.yaml file. This file permits you to override default settings, together with:
- Service Sort: You may change the service kind from
ClusterIP(inner) toNodePortorLoadBalancerfor exterior entry. - Useful resource Limits: Modify CPU and reminiscence limits for the Dashboard deployment.
- Picture Pull Secrets and techniques: Specify a picture pull secret in case your Kubernetes cluster requires authentication for pulling pictures from non-public registries.
- RBAC Configuration: Allow or disable RBAC (Function-Based mostly Entry Management) for enhanced safety. That is extremely advisable.
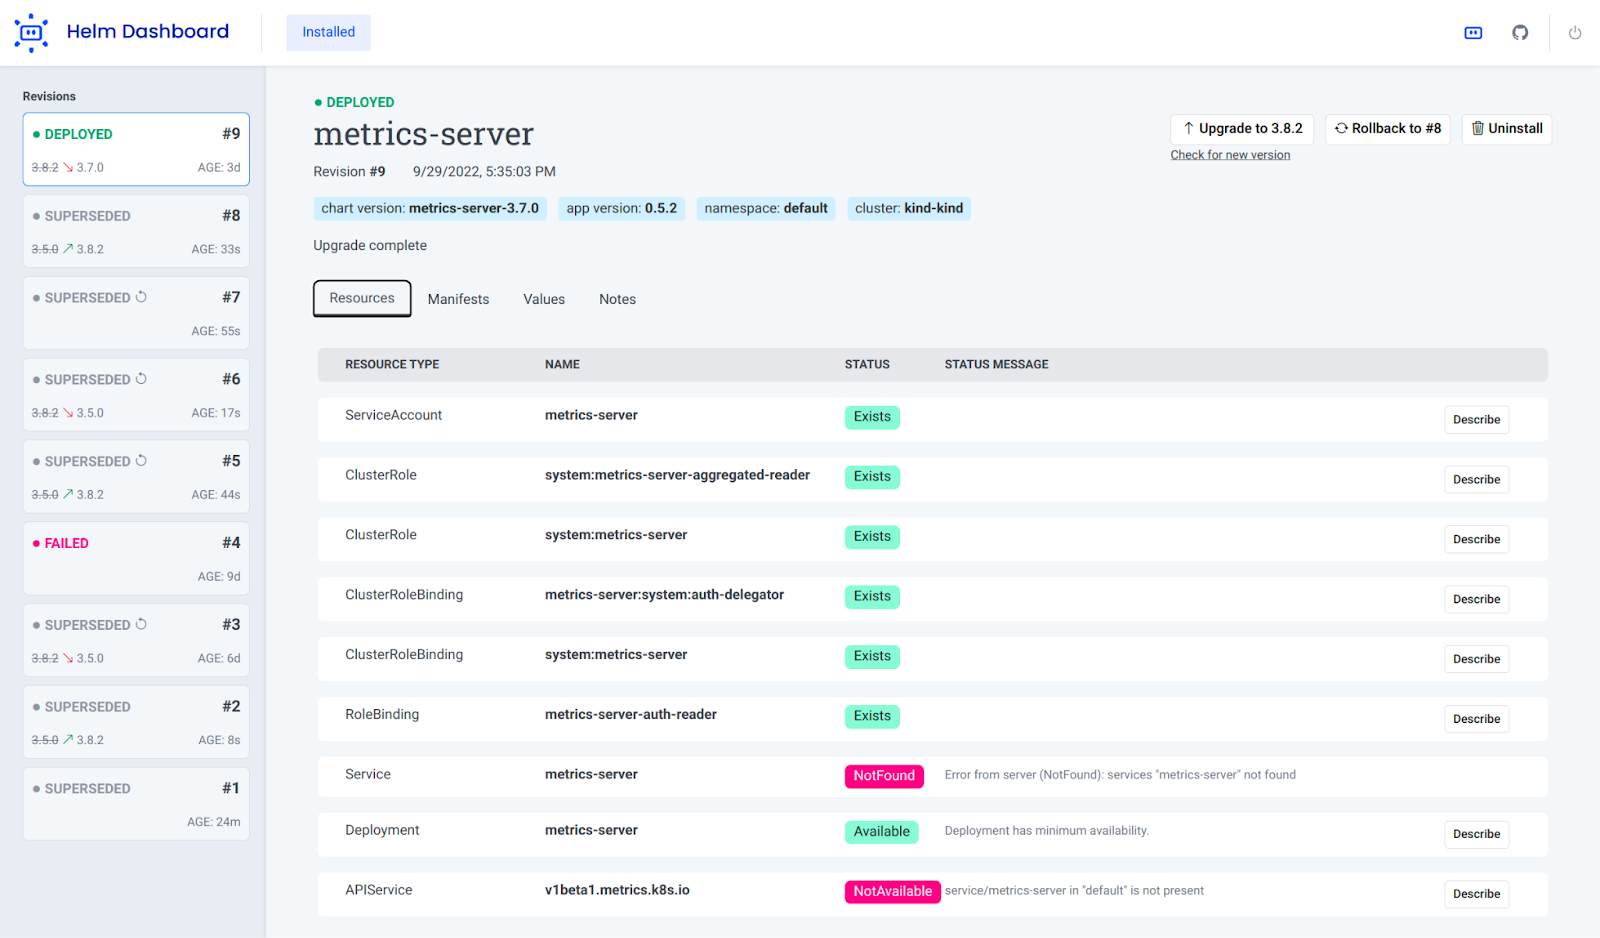
- Metrics Server Integration: Configure integration with a metrics server for displaying cluster metrics inside the Dashboard.
Instance values.yaml for exterior entry with RBAC:
service:
  kind: LoadBalancer
rbac:
  create: true
To use these customized values, use the next command:
helm set up kubernetes-dashboard kubernetes/dashboard -f values.yamlSecuring the Kubernetes Dashboard
Safety is paramount when deploying the Kubernetes Dashboard. The next finest practices are important:
- Allow RBAC: At all times allow RBAC to limit entry to the Dashboard based mostly on roles and permissions.
- Limit Community Entry: Restrict entry to the Dashboard solely from approved networks or IP addresses.
- Use Sturdy Authentication: Make use of robust passwords and think about using authentication strategies like OAuth or OpenID Join for enhanced safety.
- Common Updates: Maintain the Dashboard and its underlying parts up to date to patch safety vulnerabilities.
- Restrict Entry to Delicate Assets: Configure RBAC roles to grant solely needed permissions to customers accessing the Dashboard.
Troubleshooting Frequent Points
- Dashboard just isn’t accessible: Confirm the service kind and make sure the port is appropriately uncovered. Test for firewall guidelines that may be blocking entry.
- Authentication errors: Be sure that your kubeconfig file is appropriately configured and that you just’re utilizing the right credentials.
- Useful resource limits: If the Dashboard is unresponsive, improve the useful resource limits within the
values.yamlfile. - Picture pull errors: Confirm that your Kubernetes cluster can entry the picture registry and that any needed picture pull secrets and techniques are configured.
Superior Configuration and Customization
Past primary configuration, you possibly can additional customise the Dashboard deployment:
- Customizing the Dashboard UI: Whereas in a roundabout way configurable by the Helm chart, you possibly can deploy a customized model of the Dashboard picture with modified UI components.
- Integration with different instruments: The Dashboard may be built-in with different monitoring and logging instruments for a extra complete view of your cluster.
- Creating customized Helm charts: For advanced deployments or particular necessities, you possibly can create a customized Helm chart based mostly on the official chart. This supplies most flexibility and management.
Conclusion
Deploying the Kubernetes Dashboard with Helm presents a streamlined and environment friendly method in comparison with handbook deployment. By leveraging Helm’s options, you possibly can simply handle, improve, and customise your Dashboard deployment, guaranteeing a safe and user-friendly interface for interacting together with your Kubernetes cluster. Keep in mind to prioritize safety by enabling RBAC and proscribing entry to the Dashboard, and at all times keep up to date with the newest variations of the chart and its dependencies. The flexibleness and management supplied by Helm make it a useful device for managing the Kubernetes Dashboard and different advanced Kubernetes purposes. By understanding the intricacies of Helm charts and making use of the most effective practices outlined on this article, you possibly can confidently deploy and handle the Kubernetes Dashboard, enhancing your general Kubernetes administration expertise.

Closure
Thus, we hope this text has offered precious insights into Deploying the Kubernetes Dashboard with Helm: A Complete Information. We thanks for taking the time to learn this text. See you in our subsequent article!